Heal Nails After Gel Polish Damage
Key Features
- Step-by-step natural healing routines for gel-damaged nails
- Actionable tips to boost nail strength and prevent breakage
- Insights on recovery timelines and what to expect
- Warnings on common pitfalls to avoid during nail repair
- DIY remedies using everyday ingredients for at-home care
If you’ve ever peeled off a set of gel polish nails only to reveal thin, brittle, or peeling natural nails underneath, you’re not alone. Gel manicures have surged in popularity for their long-lasting shine and durability, but the toll they take on your natural nails can be devastating. The harsh chemicals in gels, combined with the UV exposure and filing that prep your nails for application, often lead to damage like dryness, weakening, and even ridges or splits. At Unnail, we believe in empowering women to reclaim their healthy, strong natural nails without relying on more artificial enhancements.
This comprehensive guide is your roadmap to healing after gel polish. We’ll dive into why gels cause such issues, share gentle, natural remedies to kickstart recovery, and outline sustainable habits for long-term nail health. Whether your nails are paper-thin or constantly breaking, these strategies—drawn from dermatologist insights and real-user experiences—can help you restore them naturally. Expect to learn about nourishing routines using kitchen staples, the importance of patience in the healing process, and how to avoid setbacks that could prolong your recovery. By the end, you’ll feel confident in nurturing your nails back to vitality, proving that beautiful hands don’t require gels or acrylics. Ready to say goodbye to damage and hello to resilient, natural beauty? Let’s get started on your nail transformation journey.
Understanding Nail Damage from Gel Polish
Gel polish might seem like a harmless beauty boost, but its application and removal processes can wreak havoc on your nails. The acetone soaks used to dissolve the gel can strip away natural oils, leaving your nail plate dehydrated and fragile. Meanwhile, the buffing and filing to create a smooth surface before application thins the nail bed, making it more susceptible to breakage. Over time, repeated UV curing hardens the gel but doesn’t protect your underlying natural nail, which absorbs the stress without relief.
Common signs of gel-induced damage include white spots (from over-filing), ridges (indicating structural weakness), and peeling layers (as the nail struggles to retain moisture). According to nail health experts, this damage isn’t just cosmetic—weak nails can lead to infections or ingrown issues if not addressed. The good news? Your nails are living tissue that can regenerate with the right care. Understanding this foundation is key to targeted recovery.
Timeline expectations vary, but initial improvements like reduced brittleness can appear in 2-4 weeks with consistent care. Full recovery to pre-damage strength often takes 3-6 months, as nails grow about 1/8 inch per month. Factors like diet, hydration, and genetics play a role, so track your progress weekly to stay motivated.
Natural Remedies and Daily Care Routines
Why Go Natural?
Switching to natural remedies avoids reintroducing chemicals that caused the damage in the first place. Ingredients like olive oil, lemon, and honey are packed with vitamins and antioxidants that hydrate and fortify without irritation. Start by giving your nails a break—no polish for at least a month—to allow breathing room for repair.
Here are three actionable tips to incorporate into your routine right away:
- Moisturize nightly: Before bed, massage a few drops of jojoba or coconut oil into your nails and cuticles. This seals in moisture and promotes flexibility. Do this for 5 minutes per hand, focusing on the nail bed for deeper penetration.
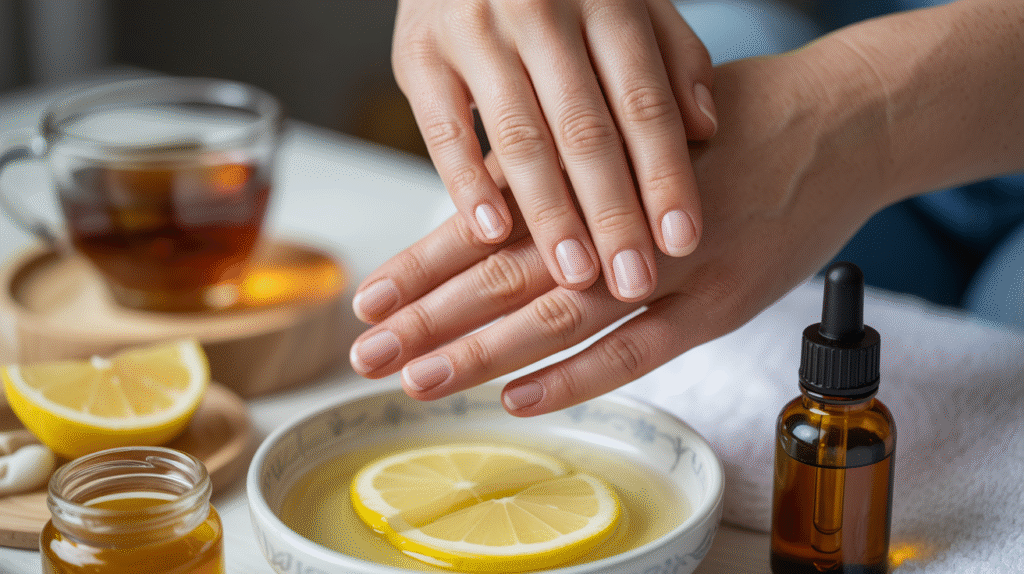
- Nutrient boost soak: Mix equal parts warm olive oil and fresh lemon juice in a bowl. Soak your nails for 10-15 minutes, twice weekly. The vitamin C in lemon strengthens keratin, while oil combats dryness. Pat dry and apply a gentle moisturizer afterward.
- Gentle filing technique: If shaping is needed, use a glass or crystal file at a 45-degree angle, filing from outer edges toward the center. Avoid buffing the top surface to prevent further thinning—aim for this once every two weeks max.
A warning on common mistakes: Don’t rush removal with aggressive scraping or excessive acetone exposure, as this exacerbates peeling and can cause permanent thinning. Always use a foil method for safe gel removal and follow up with a protein-rich treatment, like a biotin-infused serum available on Unnail.
Build a daily routine: Morning—apply a clear, strengthening base coat; evening—oil massage and hand cream. Hydration from within is crucial too; drink at least 8 glasses of water daily and incorporate biotin-rich foods like eggs and almonds. Users report noticeable hydration and reduced breakage after just 10 days of this regimen.
Long-Term Strategies for Nail Strengthening
Once initial healing is underway, focus on building resilience to prevent future damage. This phase is about consistency and protection, ensuring your nails not only recover but thrive.
Protective Habits
Wear gloves during chores involving water or chemicals—dishwashing, cleaning, or gardening—to shield your nails from moisture swings that cause brittleness. Opt for breathable gloves to avoid sweat buildup. Additionally, trim nails straight across and keep them short (under 1/4 inch) during recovery to minimize stress on the tips.
Nutritional Support
Nails are 95% keratin, a protein, so amp up your intake of protein, iron, and omega-3s. Think salmon for fatty acids, spinach for iron, and nuts for zinc—all essential for nail growth. Supplements like collagen peptides can accelerate repair, but consult a doctor first. Expect stronger growth by month two with a balanced diet.
For advanced care, explore tools like nail buffers with built-in strengtheners or LED lamps for at-home treatments (sans gel, of course). On Unnail, you’ll find curated products that align with natural healing principles. Remember, patience is key—rushing back to gels too soon undoes progress, potentially extending recovery by months.
Incorporate weekly check-ins: Photograph your nails to monitor growth and health. If no improvement after six weeks, consider professional advice to rule out underlying issues like thyroid imbalances. With these strategies, many women achieve robust, gel-free nails that look polished naturally.
Conclusion
Healing nails after gel polish damage is a journey of gentle care, natural nourishment, and smart habits that pay off with stronger, more beautiful results. From understanding the root causes to implementing daily soaks, protective routines, and nutrient boosts, you’ve got the tools to transform weakened nails into resilient ones. Avoid common pitfalls like over-filing or hasty returns to enhancements, and embrace the 3-6 month timeline for full recovery—it’s worth the wait for lasting health.
At Unnail, we’re passionate about helping you achieve that. Ready to personalize your plan? Take our free 2-minute nail recovery quiz today to get tailored advice just for your nails.