Recover Natural Nails After Acrylics
Key Features
- Step-by-step guide to repairing nail damage from artificial enhancements
- Natural remedies and nutrition tips for long-term nail strength
- Realistic timelines and common pitfalls to avoid during recovery
- Actionable daily routines to promote healthy, resilient natural nails
Have you ever peeled off your acrylics or soaked off those gels, only to reveal thin, brittle, or peeling natural nails underneath? You’re not alone. Many women who love experimenting with trendy nail enhancements like acrylics, gels, and press-ons face this common aftermath. The good news is that with the right approach, your natural nails can bounce back stronger than ever. At Unnail, we’re passionate about empowering women to heal and nurture their nails without relying on harsh chemicals or frequent salon visits.
Nail damage from artificial enhancements often stems from the removal process—filing down layers, using acetone soaks, or prying off press-ons—which strips away the nail’s protective surface and can lead to dehydration, breakage, and even infections if cuticles are mishandled. But understanding the science behind it is the first step to recovery. Nails are made of keratin, a protein that thrives on moisture, nutrients, and gentle care. When damaged, they need time to regenerate, growing from the matrix at the base at about 3 millimeters per month.
In this guide, we’ll explore how to assess your nail health, implement natural strengthening methods, and build habits for lasting resilience. Whether your nails are ridged, splitting, or just weak, these strategies focus on holistic care—inside and out. From DIY remedies using kitchen staples to expert-recommended products, you’ll learn practical ways to restore your nails’ natural beauty. Recovery isn’t overnight, but with consistency, you can achieve nails that are healthy, shiny, and ready for subtle enhancements if you choose. Let’s dive in and reclaim your natural nail strength.
Understanding Nail Damage
Before jumping into fixes, it’s crucial to recognize the types of damage caused by popular nail enhancements. Acrylics and gels, while stunning, often involve harsh adhesives and UV curing that weaken the nail plate over time. Press-ons, though temporary, can cause lifting and tears if not removed carefully. Common signs include white spots (leukonychia from trauma), ridges (indicating dehydration), and onycholysis (nail lifting from the bed due to moisture imbalance).
The root issue? These enhancements prevent natural oil production and airflow to the nail bed, leading to brittleness. According to dermatologists, prolonged use can thin nails by up to 50%, making them prone to splitting. If you’ve recently removed enhancements, your nails might feel like paper—thin and flexible in the wrong ways. But don’t panic; this is reversible.
Assessing Your Nail Health
Start by examining your nails under good light. Look for discoloration, fragility, or cuticle dryness. A simple at-home test: Gently press on the free edge; if it bends excessively or chips, strengthening is needed. For deeper issues like fungal infections (yellowing or thickening), consult a professional. At Unnail, we emphasize early intervention to prevent long-term damage.
Timeline expectations: Visible improvements in texture can appear in 4-6 weeks as the damaged top layers grow out, but full recovery from severe thinning might take 3-6 months. Patience is key—nails grow slowly, so focus on the health of new growth from the root.
Effective Recovery Strategies
Recovering your natural nails requires a multi-faceted approach: hydration, nutrition, and protection. Here are proven strategies tailored for post-enhancement healing.
Actionable Tip 1: Hydrate with Natural Oils
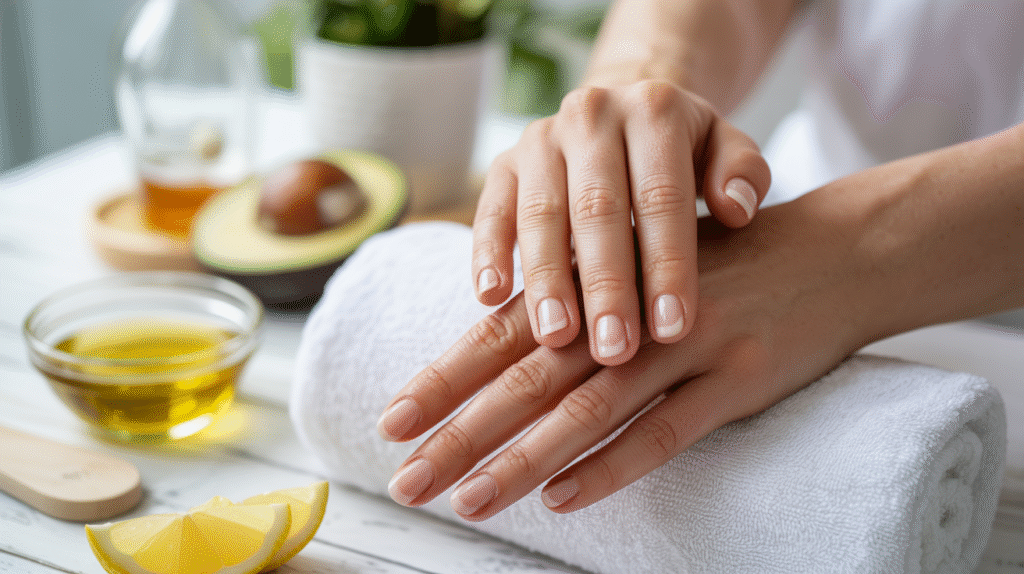
Dehydrated nails crack easily, so incorporate daily oil treatments. Mix equal parts olive oil and lemon juice (for vitamin C boost) and massage into nails and cuticles for 10 minutes nightly. The oils seal in moisture, while lemon brightens. Do this for two weeks to see smoother cuticles. Pro tip: Wear cotton gloves overnight to enhance absorption.
Actionable Tip 2: Boost Nutrition from Within
Nails reflect your diet—biotin, protein, and omega-3s are essentials. Aim for 2,500 mcg of biotin daily through foods like eggs, almonds, and salmon, or consider a supplement after consulting your doctor. Hydrate with at least 8 glasses of water daily to support keratin production. In one month, you might notice less breakage as new nail growth strengthens.
Actionable Tip 3: Gentle Buffing and Filing
Avoid aggressive filing that thins nails further. Use a glass or crystal file at a 45-degree angle, shaping gently once a week. Follow with a buffer to smooth ridges, but never overdo it—over-buffing removes protective layers. Pair this with a strengthening base coat free of formaldehydes for added resilience.
Warning of common mistakes: Many women rush back to enhancements too soon, re-damaging fragile nails, or use acetone wipes excessively during removal, exacerbating dryness. Always opt for oil-based removers and give your nails a 4-week break post-removal to let them stabilize.
For more personalized routines, explore resources at Unnail, where we break down product recommendations and science-backed advice.
Long-Term Maintenance
Once initial recovery is underway, shift to maintenance to prevent future damage. Consistency turns weak nails into strong ones.
Daily Routines for Strength
Build a 5-minute morning ritual: Cleanse with mild soap, apply cuticle oil, and moisturize hands. Weekly, do a DIY mask—blend avocado (for healthy fats) with honey and apply for 15 minutes. This nourishes and protects against environmental stressors like cold weather or frequent handwashing.
Protecting Against Relapse
When ready for polish, choose breathable formulas and limit to 7-10 days. Always use a base and top coat to shield the nail. If opting for enhancements again, space them out and prioritize professional removal. Track progress with photos every two weeks to stay motivated.
Timeline update: By month three, expect 80% strength recovery if consistent; full vitality by six months. Remember, lifestyle factors like stress management play a role—yoga or meditation can indirectly support nail health by improving circulation.
Incorporate these habits, and your natural nails will not only heal but thrive, giving you confidence without artificial boosts. For deeper dives into nutrition’s impact on nails, check out Unnail’s educational articles.

Conclusion
Healing and strengthening your natural nails after damage from gels, acrylics, and press-ons is a journey of gentle care and patience. By understanding the damage, applying hydration and nutrition strategies, and maintaining protective habits, you can achieve resilient, beautiful nails that reflect your healthy lifestyle. Avoid common pitfalls like premature enhancements, and embrace the timeline—improvements start in weeks, with full recovery in months.
At Unnail, we’re here to support your nail wellness every step. Ready to get personalized insights? Take our free 2-minute nail health quiz to uncover your recovery plan tailored just for you.